
Install at top-level as document manager
shellCMS, a static site generator, is available for download as a
tarball:
http://bkhome.org/files/shellcms.tar.gz
Writing this document in the first-person, I, Barry, have plans
for more features. In particular, I would like to implement a GUI
frontend. For now, the script shellcms has to be run
from a terminal.
I also plan to post documentation. First up, outlining how shellCMS is setup as a documentation site.
My website, bkhome.org, is mostly just documentation files, for various projects, just static web pages, plus files to download. For a purely static site like this, shellCMS is ideal, set in its "documentation" mode. I do also have a blog at bkhome.org/news, but shelve that one for now.
To setup shellCMS on your local PC, download shellcms.tar.gz
and expand it. It should be expanded where-ever you want the local
files for your website to be. In the snapshot below, I have
expanded it in a download folder, but it should be somewhere like
/mnt/sdb1/my-website (or whatever).
After expanding the tarball, this is what is seen:
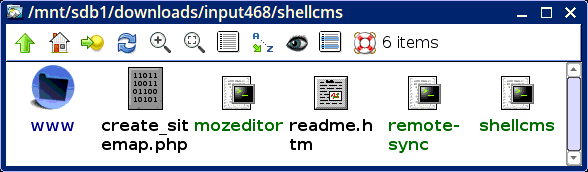
Folder www has everything that will be uploaded to
the remote site. The other files:
create_sitemap.php |
PHP script to create sitemap.xml file for
search engines |
mozeditor |
Wrapper for SeaMonkey Composer HTML editor |
remote-sync |
Script to upload to remote site |
shellcms |
shellCMS bash script |
Inside the www folder:
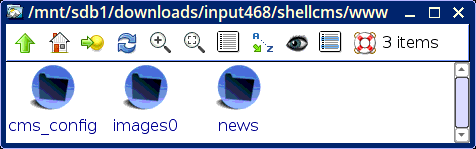
Nothing much there yet. Brief explanation about each of the folders in above snapshot:
cms_config |
This has various configuration files for shellCMS, and this folder does not have to be uploaded. By default, it isn't. |
images0 |
The basic set of images required by shellCMS |
news |
Example of a nested installation of shellCMS |
As already stated, everything inside www, with the
exception of cms_config, gets uploaded to the remote
host site. We now need to create a first document, but firstly, a
bit of housekeeping...
File www/cms_config/config is a configuration file,
and you should peruse that, and set some variables as appropriate.
In particular, edit these:
| EDITOR="mozeditor" |
HTML editor for creating and editing posts |
| MODE="document" |
shellCMS can operate on "document" or "blog"
mode |
| global_site_url="http://bkhome.org" |
Website that you will be uploading to |
| global_cms_url="${global_site_url}" |
Can specify if shellCMS is to be in a folder
on remote site |
Actually, the full set of variables are inside the shellcms script, and cms_config/config only needs to have those that override the defaults.
The MODE is important, as shellCMS can be optimized either as a document manager, or as a blog. For this tutorial, "document" is the choice.
Here is what you see inside cms_config:
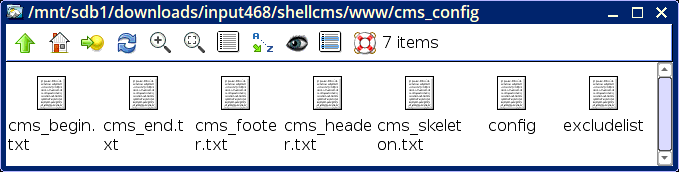
Those cms_* files control the appearance of the generated web pages. Normally, no need to change them. File config, as already mentioned, needs to be perused and variables changed as appropriate. File excludelist is a list of folders and files that will not be uploaded, and if on the remote site will be ignored.
Anyway, right now we can go ahead and create the first post. With
a terminal open at same folder as shellcms, type this:
# ./shellcms www post
The first parameter specifies the path to the local website. The second parameter is a command, to create a new post. Note, if you type "shellcms" then just ENTER, a summary of the commands will display.
After asking which tag you want this post to go in, the editor will pop up, and you can create the post. You can see in the above table, that EDITOR="mozeditor". This is for SeaMonkey Composer, a WYSIWYG HTML editor, part of the SeaMonkey browser suite. There are other WYSIWYG HTML editors, or you could even use a text editor, such as Geany. I recommend though, that you do install SeaMonkey, if not already, as creating posts for shellCMS becomes a very pleasant experience.
Well, any WYSIWYG HTML editor should be a pleasant experience.
SeaMonkey, though, is what I use, and mozeditor is a
wrapper script that ensures Composer starts in a new instance.
In document mode, only one tag is allowed per post. For the first post, I have chosen "admin", and the post gets saved in folder admin. That is, there will be a folder for each tag.
After typing in the post, save, exit, then there is a question whether you want to edit it again, save it as a draft, or post it. Chose the latter, by entering "P". Now we have something inside the www folder:
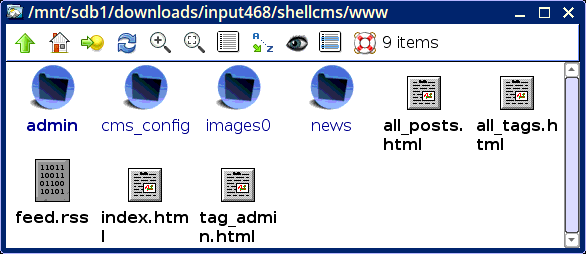
To edit an existing post, type the path and filename, relative to inside www, for example:
# ./shellcms www edit admin/first-test-post.htmraw
Each tag-folder, for example admin, has an images
folder, and you can reference images in it, for example, this HTML
code in the post:
<img src="images/blog-installed.png" alt="image">
Though of course, with a WYSIWYG HTML editor, no need to type in that actual code, just select "insert -> image" from the menu.
After you upload the contents of www to the remote site, those tag-folders become valid URLs. For example:
An index page of all posts in "admin" will display. Or, you can access a specific post. Um, better choose one that does exist on my site. This one, with tag "shellcms":
http://bkhome.org/shellcms/shellcms-tarball-uploaded.html
Having created a post, you can now upload it...
Uploading
Before uploading though, you have to edit the script remote-sync. Look in the script, it should be pretty obvious how to do that. Note, if uncertain, rsync can have a parameter "--dry-run", which will show you what it would upload, without actually doing it.
OK, now do it:
# ./remote-sync www
Notice the "www" appended. It is necessary to specify the folder, as this script can be used to upload nested shellCMSs. For example "www/news".
Nested shellCMSs are very useful. They are completely independent, and posts created, edited and uploaded, completely independently of the top-level shellCMS.
Note that remote-sync will detect nested shellCMSs. So,
in the above example where path "www" was specified, remote-sysnc
will detect a nested shellCMS at www/news and not upload
it.
More...
There is a lot more documentation that can be written. As mentioned, shellCMS can be nested, one within the other. The shellcms.tar.gz tarball has one example, the news folder. This is a nested shellCMS configured as a blog.
I have written a separate tutorial about this nested-blog:
http://bkhome.org/shellcms/installing-shellcms-as-a-blog.html
Have fun!
Tags: shellcms